Introduction
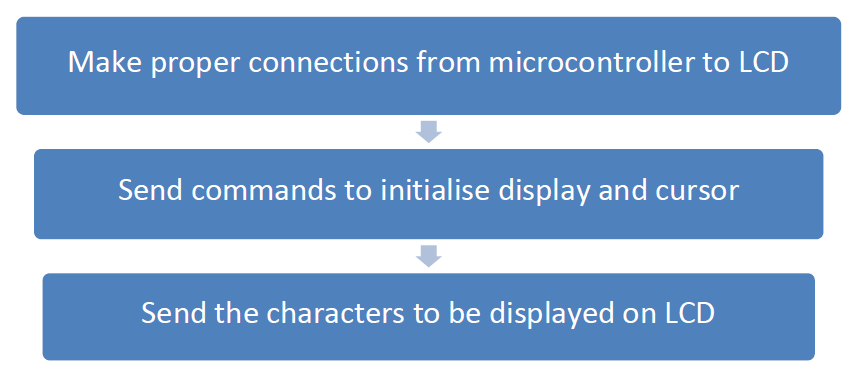
LCD is used to provide textual information from microcontroller. It makes the applications in microcontroller more interactive. LCD comes in various configurations such as 20 x 2 , 16 x 1 , 40 x 1 , 16 x 2 etc. Out of these, 16 x 2 is widely used. LCD also has a microcontroller in it. This microcontroller is already coded to display characters on the screen. Now we have to send the data to this LCD through our microcontroller by following the given steps -
LCD

Circuit Diagram
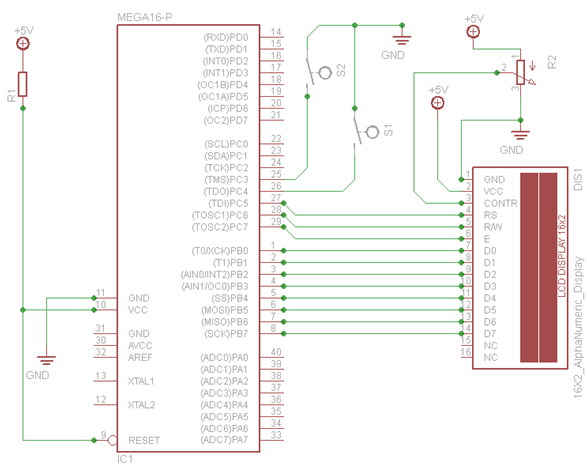
(Note : Connect pin 16 to VCC and pin 15 to Ground)
By adjusting the value of resistance in potentiometer the contrast can be adjusted. In this tutorial, PORTB is used for transferring Data from Microcontroller to LCD and PORTC as the Control Port.
Properties of the LCD
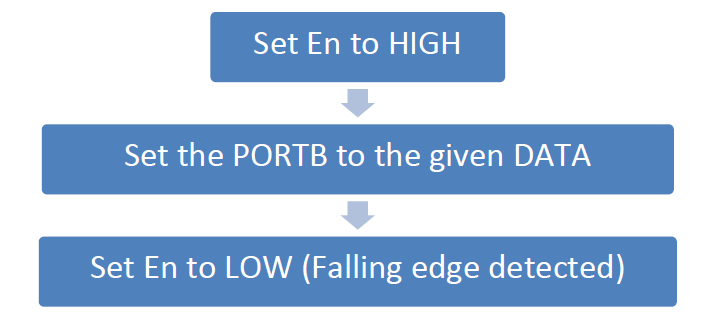
The LCD can be used as 8-bit interface or 4-interface. In this tutorial I am using 8-bit interface. The whole of PORTB is connected to pins 7-14 of LCD. LCD has three control Pins namely Enable (En is pin 6), Read/Write (RW is pin 5) and Register Select (RS is pin 4). Writing data or commands on the LCD registers can happen only on the falling edge of the En. So, before sending any command or data,
When RW is HIGH, we can read from LCD and when RW is LOW we can print on LCD. Since we want to only print on LCD we can simply Ground the RW pin.
When RS is HIGH, we need to send the character’s value in PORTB and when RS is LOW we need to send the command’s value in PORTB.
So now that we have understood the functioning of LCD, we can move to the coding part of it.
CODE for LCD
Before Starting this section you should go through these links
For LCD we require only three primary functions LCD_cmd(), LCD_write() and main()
void LCD_cmd(unsigned char cmd);
This function takes a character as input which it initialises to PORTB keeping the value or RS LOW (since, we want to send a command).
void LCD_write(unsigned char data);
This function to display the character which is taken as input. It should be noted that while displaying the value of RS is HIGH.
Now, either you learn the commands required for the LCD and initialize the LCD using those commands in the main or you can use the functions which I have provided in my code.
The Full LCD code is given below. It has many functions which would be useful. The details about the function is given in comments in each function